 Ask A Bot
Getting Started
Getting started with Relay is as simple as using the default settings. You can also configure Relay to suit your organization's needs. Check the Configuration Options page for a detailed discussion of operating scenarios.
The Relay server is called relay. Download binaries from GitHub
Releases. A Docker image is provided on DockerHub.
Initializing Configuration
To create the initial configuration, use Relay's relay config init command,
which puts configuration files in the .relay folder under the current working
directory.
In Docker, provide the configuration directory using the standard mechanisms offered by Docker, either by mounting Docker volumes or by building a new container and copying in the files.
# Adjust permissions for the configuration directory
# The :z option is only necessary on selinux.
# See https://docs.docker.com/storage/bind-mounts/#configure-the-selinux-label.
docker run --rm -it                  \
  -v $(pwd)/config/:/work/.relay/:z  \
  --entrypoint bash                  \
  getsentry/relay                    \
  -c 'chown -R relay:relay /work/.relay'

# Generate the configuration
docker run --rm -it                  \
  -v $(pwd)/config/:/work/.relay/:z  \
  getsentry/relay                    \
  config init
Select the default configuration to create a minimal configuration file. You can choose to override the default settings by selecting "create custom config" and customizing these parameters:
The
modesetting, which configures the major mode in which Relay operates. For more information on available Relay modes, refer to Relay Modes.Currently, only
proxyandstaticmode are available to all organizations. Relay inmanagedmode is available only on the Business and Enterprise plans.The
upstreamsetting configures the server to which Relay will forward the events (by default the mainsentry.ioURL).The
portandhostsettings configure the TCP port at which Relay will listen. This is the address to which SDKs send events.
Settings are recorded in .relay/config.yml. Note that all configuration values
are optional and default to these settings:
relay:
mode: managed
# The upstream hostname is taken from any of your DSNs.
# Go to your Project Settings, and then to "Client Keys (DSN)" to see them.
upstream: https://o0.ingest.sentry.io
host: 0.0.0.0
port: 3000Configurations are fully documented in Configuration Options.
Creating Credentials
Not applicable in proxy or static mode.
In addition to config.yml, the init command creates a credentials file, credentials.json, which is placed in the same .relay directory. This file contains both the public and private key Relay uses to authenticate with the upstream server.
As a result, this file must be protected from modification or view by unauthorized entities.
A typical credentials file is similar to this example:
{
  "secret_key": "5gkTAfwOrJ0lMy9aOAOmHKO1k6gd8ApYkAInmg5VfWk",
  "public_key": "nDJI79SbEYH9-8NEJAI7ezrgYfoIPW3Bnkg00k1z0fA",
  "id": "cde0d72e-0c4e-4550-a934-c1867d8a177c"
}
Use the public_key to register your Relay with the upstream server when running it in managed mode.
Registering Relay with Sentry
Not applicable in proxy or static mode.
To operate in managed mode, Relay pulls configuration for PII stripping,
filtering, and rate limiting from your organization and
To register Relay with Sentry:
Copy the contents of the public key, either by inspecting the
credentials.jsonfile or by running:Copieddocker run --rm -it \ -v $(pwd)/config/:/work/.relay/ \ getsentry/relay \ credentials showClick on Settings in the main navigation for Sentry, then select Relays.
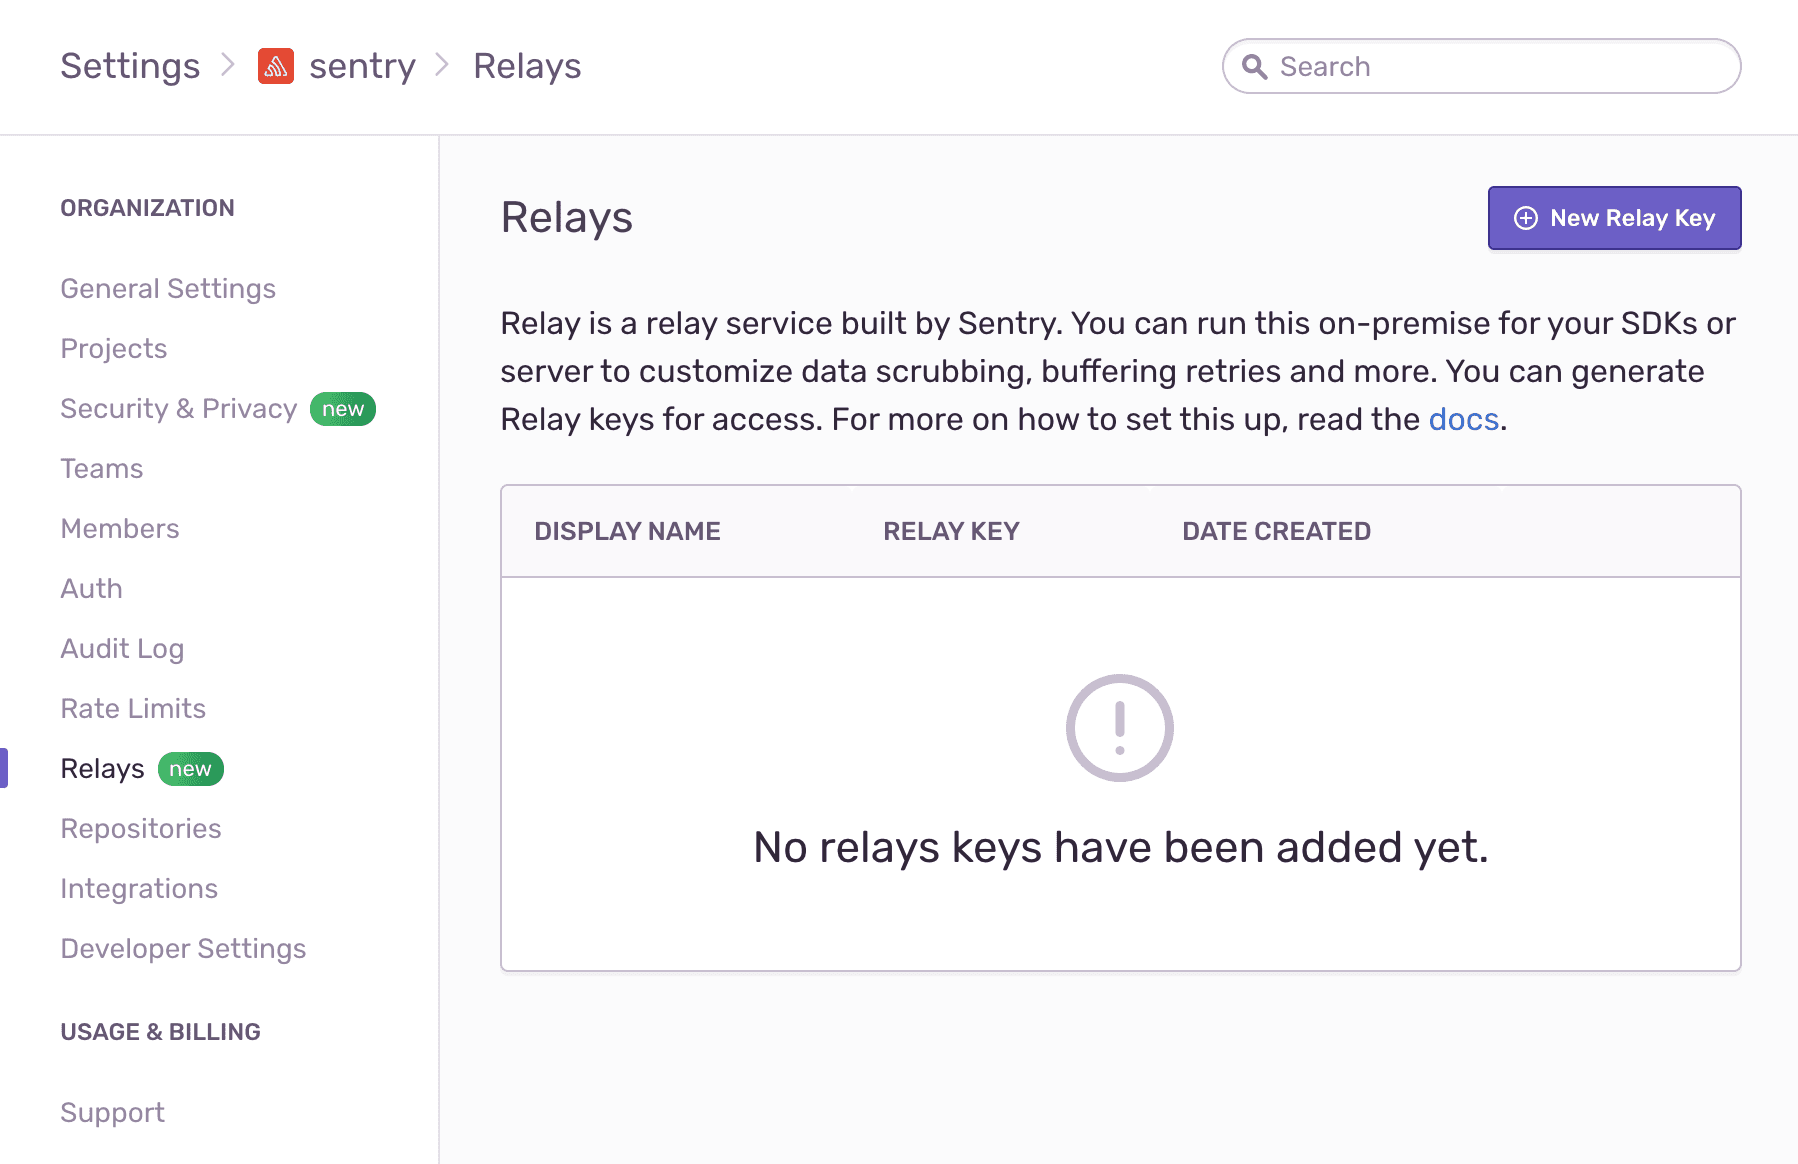
- Click New Relay Key to add the key and save it:
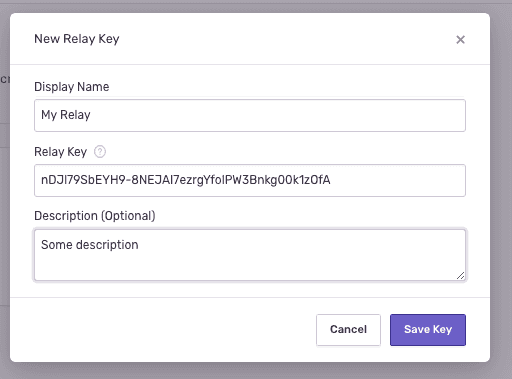
This process registers Relay with Sentry so it is ready to send messages. See Configuration Options to learn more about Relay configuration options.
Running Relay
After registering Relay with Sentry, it is ready to run:
docker run --rm -it                \
  -v $(pwd)/config/:/work/.relay/  \
  -p 3000:3000                     \
  getsentry/relay                  \
  run
Under default configuration, Relay emits log output similar to:
 INFO  relay::setup > launching relay from config folder .relay
 INFO  relay::setup >   relay mode: managed
 INFO  relay::setup >   relay id: cde0d72e-0c4e-4550-a934-c1867d8a177c
 INFO  relay::setup >   public key: nDJI79SbEYH9-8NEJAI7ezrgYfoIPW3Bnkg00k1z0fA
 ...
 INFO  relay_server::actors::upstream > relay successfully registered with upstream
Refer to the Logging page for more information on how to configure Relay's logging.
If you moved your config folder (for example, for security reasons), use the --config option to specify the location:
docker run --rm -it                \
  -v $(pwd)/config/:/etc/relay/    \
  -p 3000:3000                     \
  getsentry/relay                  \
  run --config /etc/relay/
Sending a Test Event
Once Relay is running and authenticated with Sentry, send a test event to one of the projects in your organization.
Get the
https://12345abcdef10111213141516171819@o1.ingest.sentry.io/2345
Next, replace parts of the DSN to match the address at which Relay is reachable.
For instance, if Relay listens at http://localhost:3000, change the protocol
and host of the DSN to:
http://12345abcdef10111213141516171819@localhost:3000/2345
Use the new DSN in your SDK configuration. To test this, you can send a message
with sentry-cli (installation instructions):
export SENTRY_DSN='http://12345abcdef10111213141516171819@127.0.0.1:3000/2345'
sentry-cli send-event -m 'A test event'
In a few seconds, the event should appear in the issues stream in your project.
Next Steps
With a working Relay instance, you can both monitor and scale your Relay setup.
Our documentation is open source and available on GitHub. Your contributions are welcome, whether fixing a typo (drat!) or suggesting an update ("yeah, this would be better").